

I decided to change the horrible OEM halogen headlight assembly to an LED/Daymaker style for increased visibility & of course, cool kid points. I don't see a "real" tutorial on here for it, so I figured I'd try to make one.
The Parts:
1.) I used Z1 Enterprises' Headlight bucket kit. This came with the bucket, mounting rings, & all associated nuts/screws for the headlight I would use.
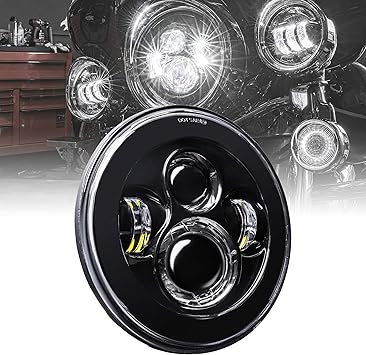
2.) I used TRUE MODS 7" LED Headlight. Its non-halo & is H4, so plug & play. Was about 40 bones on Amazon.
3. A good amount of patience.
The Tools:
1.) 10mm socket
2.)12mm socket/wrench
3.) smaller & medium size philips head screwdriver
4.)Optional, but some needle nose pliers help at times as well.
The process:
1. Remove the OE headlight assembly. There are a few screws to be removed, but then the headlight should come out. Disconnect the H4 connector from the bulb (Just pull, there isnt a lock on it)
2. Disconnect the connectors in the bucket. They do have "locks" on them, but just push them down while you pull the opposite end out. They all are different (2 pin, 6 pin, 9 pin) so you shouldn't get them confused when reconnecting. The 9-pin on mine was pretty tight, so it took some wiggling & hitting it with my purse a few times, but I got it out.
3. Use the 12mm wrench & 10mm socket to remove the OEM bucket from the frame. SAVE THE RUBBER GROMMETS & BOLTS ON THE SIDES OF THE BUCKET. YOU WILL NEED THEM.
You may have 1 wire that is connected with a butt connector that I had to cut the OEM bucket to side it out of the bucket. I did, but your mileage may vary.
4. Pull out your LED headlight (you just need the headlight itself, no adapters for the 750)
5. Pull out the shiny metal rings (all of them) from the Z1 enterprises box & bag of screws & place the shiny golden ring on the back of the headlight (lens facing down). This ring should only fit 1 way, with the 3 notches on the ring matching the 3 notches on the light. DO NOT FORCE IT. It will be loose at this moment in time, but the next step will secure it more.
6. There will be another, more silver ring with a 1mm wide long slit on it. Place this on from the front of the light (lens side). The slit will match up with an indent/lip on the gold ring.
7. Place retaining screws from the Z1E bag into the areas to secure the 2 pieces together. It should be much more snug now.
8. Now place The chrome piece on, from the top/ down on the lens. You will see there is a little bracket poking out on the gold bracket & 1 outward facing hole on the chrome. This is your adjustment screw bracket. Place your long screw in through the front, with the spring inbetween the chrome & gold area, & the square washer on the back of the gold bracket area. This will take some time & is very annoying, but it works. I promise.
9. There are a few more empty holes to mate the chrome & gold part together. Take some more screws & place them in there.
Congratulations! The headlight is ready to go in!
10. There are 2 12mm bolts in the back of the headlight bracket (1 on each side). Loosen them to get them to "open" a little. The bracket is a little larger than OE, & will not fit without loosening those bolts. An extended/flex-head ratchet works best (Shout out Capri Tools extended flex-head ratchet)
11. Place the rubber grommets, rubber washer, & metal sleeve into the Z1E bucket. The Z1E holes on the side are more like a "0" than "O" like OEM, but it'll work. Again, trust the process.
12. Feed your wires into the bucket (The hole should be at the bottom, not top). You can try to feed all of the connectors in, or just tuck them behind the bucket. I personally just fed the H4 connector & Accessory wires in, but its up to you.
13. Use your original bolt, line up the bucket & slide the bolt through to hold it in place. do this on each side. Then place the nut on the inside of the bucket & tighten each (10mm & 12mm)
14. Place your headlight in! There are 2 screw holes (at 4 & like 8 o clock) to line your headlight up with the bucket. Use the black screws in the Z1E bag to secure it.
15. Congratulations! You're done! Give yourself a beer & a pat on the back. Check headlight alignment & adjust as necessary.
If you have not bypassed the RLU, you will have the "HEADLIGHT" & "HI BEAM" lights flicker. You must do the RLU mod to prevent this. There are multiple writeups/videos on this. It only takes about 10 mins extra to do, I just didn't do it during this install
Hopefully, this helps people. In total, this was <$100 to do (Bucket & Headlight) & plug & play.
![Image]()
![Image]()
The Parts:
1.) I used Z1 Enterprises' Headlight bucket kit. This came with the bucket, mounting rings, & all associated nuts/screws for the headlight I would use.
2.) I used TRUE MODS 7" LED Headlight. Its non-halo & is H4, so plug & play. Was about 40 bones on Amazon.
Amazon.com: TRUE MODS 7" LED Headlight for Harley Davidson [Black-Finish] H4 Converters Plug and Play For Road King Electra Glide Ultra Classic Limited Heritage Softail Fat Boy Tri Street Glide Free Wheeler : Automotive
Buy TRUE MODS 7" LED Headlight for Harley Davidson [Black-Finish] H4 Converters Plug and Play For Road King Electra Glide Ultra Classic Limited Heritage Softail Fat Boy Tri Street Glide Free Wheeler: Headlight Bulbs & Assemblies - Amazon.com ✓ FREE DELIVERY possible on eligible purchases
www.amazon.com
3. A good amount of patience.
The Tools:
1.) 10mm socket
2.)12mm socket/wrench
3.) smaller & medium size philips head screwdriver
4.)Optional, but some needle nose pliers help at times as well.
The process:
1. Remove the OE headlight assembly. There are a few screws to be removed, but then the headlight should come out. Disconnect the H4 connector from the bulb (Just pull, there isnt a lock on it)
2. Disconnect the connectors in the bucket. They do have "locks" on them, but just push them down while you pull the opposite end out. They all are different (2 pin, 6 pin, 9 pin) so you shouldn't get them confused when reconnecting. The 9-pin on mine was pretty tight, so it took some wiggling & hitting it with my purse a few times, but I got it out.
3. Use the 12mm wrench & 10mm socket to remove the OEM bucket from the frame. SAVE THE RUBBER GROMMETS & BOLTS ON THE SIDES OF THE BUCKET. YOU WILL NEED THEM.
You may have 1 wire that is connected with a butt connector that I had to cut the OEM bucket to side it out of the bucket. I did, but your mileage may vary.
4. Pull out your LED headlight (you just need the headlight itself, no adapters for the 750)
5. Pull out the shiny metal rings (all of them) from the Z1 enterprises box & bag of screws & place the shiny golden ring on the back of the headlight (lens facing down). This ring should only fit 1 way, with the 3 notches on the ring matching the 3 notches on the light. DO NOT FORCE IT. It will be loose at this moment in time, but the next step will secure it more.
6. There will be another, more silver ring with a 1mm wide long slit on it. Place this on from the front of the light (lens side). The slit will match up with an indent/lip on the gold ring.
7. Place retaining screws from the Z1E bag into the areas to secure the 2 pieces together. It should be much more snug now.
8. Now place The chrome piece on, from the top/ down on the lens. You will see there is a little bracket poking out on the gold bracket & 1 outward facing hole on the chrome. This is your adjustment screw bracket. Place your long screw in through the front, with the spring inbetween the chrome & gold area, & the square washer on the back of the gold bracket area. This will take some time & is very annoying, but it works. I promise.
9. There are a few more empty holes to mate the chrome & gold part together. Take some more screws & place them in there.
Congratulations! The headlight is ready to go in!
10. There are 2 12mm bolts in the back of the headlight bracket (1 on each side). Loosen them to get them to "open" a little. The bracket is a little larger than OE, & will not fit without loosening those bolts. An extended/flex-head ratchet works best (Shout out Capri Tools extended flex-head ratchet)
11. Place the rubber grommets, rubber washer, & metal sleeve into the Z1E bucket. The Z1E holes on the side are more like a "0" than "O" like OEM, but it'll work. Again, trust the process.
12. Feed your wires into the bucket (The hole should be at the bottom, not top). You can try to feed all of the connectors in, or just tuck them behind the bucket. I personally just fed the H4 connector & Accessory wires in, but its up to you.
13. Use your original bolt, line up the bucket & slide the bolt through to hold it in place. do this on each side. Then place the nut on the inside of the bucket & tighten each (10mm & 12mm)
14. Place your headlight in! There are 2 screw holes (at 4 & like 8 o clock) to line your headlight up with the bucket. Use the black screws in the Z1E bag to secure it.
15. Congratulations! You're done! Give yourself a beer & a pat on the back. Check headlight alignment & adjust as necessary.
If you have not bypassed the RLU, you will have the "HEADLIGHT" & "HI BEAM" lights flicker. You must do the RLU mod to prevent this. There are multiple writeups/videos on this. It only takes about 10 mins extra to do, I just didn't do it during this install
Hopefully, this helps people. In total, this was <$100 to do (Bucket & Headlight) & plug & play.


